Mostly computer or any devices get their IP addresses via DHCP. Dynamic Host Configuration Protocol (DHCP) is a network protocol that enables a server to automatically assign an IP address to a computer from a defined range of numbers. DHCP is basically a system for the host, like a router or server, gives out IP addresses to devices so that they can communicate with the host and with each other over the network.
Every device that is on the network has a unique IP address. Here the IP address can change over time depending on several factors. This change does not cause any problem but in some situations, you need a static IP address. For example, if your computer or device is used only for a media server in your home, so here you need a static IP address because you need to connect to the computer via its IP address.
Below two ways you can assign static IP address,
- The first way, logging into your router and reserving an IP address for a particular device.
- The second way, you can easily assign static IP addresses to Windows, Mac, Linux machines or any other device easily.
Windows – Assign Static IP Address
The following procedure will work for Windows 7, Windows 8 or Windows 10.
Step 1: The first thing we want to do is to open the Network and Sharing Center on your computer. To open this setting click on the Start button and typing in network and sharing.
Step 2: Now click on Change adapter settings on the left-hand side.
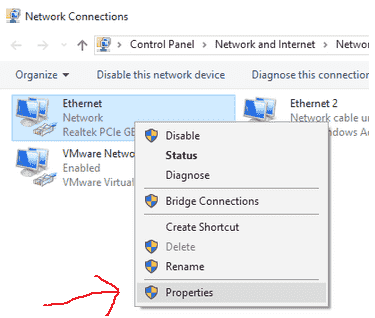
Step 3: This will open the Network Connections window where you will see a list of all physical and virtual network devices.
Step 4: Now you need to right-click on the network connection that is currently being used to connect the computer to the network and choose Properties. If you are connecting via cable, use Ethernet. If it is WiFi then use Wireless Network Connection.
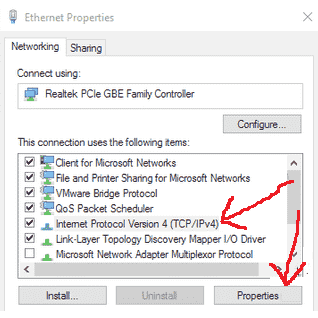
Step 5: Click and select Internet Protocol Version 4 (TCP/IPv4) and then click on Properties again.
Step 6: Finally, this will bring you to the settings screen where you can assign a static IP address.
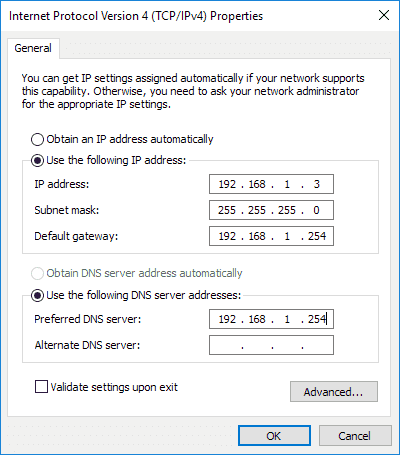
Now you need to select the IP address radio button and then type IP address, subnet mask, and default gateway. The Default Gateway and Preferred DNS server should both be set to the IP address of your router. By default, when you type in the IP address, it fills out the subnet mask for you.
Mac (OS X) – Assign Static IP Address
Step 1: You have to go to System Preferences. To get there, click on the Apple icon at the top left of the menu bar.
Step 2: Next, click on the Network icon from the list of item.
Step 3: Select the network and click on the connection and then click on the Advanced button at the bottom right.
Step 4: Click on the TCP/IP tab and you’ll see a drop-down next to Configure IPv4.
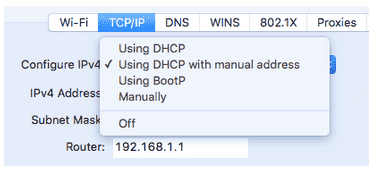
Step 5: In the dropdown, you have several choices. In OS X, you can choose from either DHCP with the manual address or Manually.
Now you can say changing the IP address for your computer is a simple task. The harder part is knowing what IP address to use so that you don’t run into any conflicts.